Wednesday, October 12, 2011

Somewhat Sneaky Sloppy Joes


I've never been a huge fan of Sloppy Joes. Mostly because the only ones I'd ever had were as a child, when the men in my family were making them out of a can. They were bland and never looked appetizing. That and they always remind me of that Lunch lady song by Adam Sandler. Suh-lop-pee Joe, slop, Slop-pee Joe. 

That was until I came across this recipe by the Foodie Bride. They taste nothing like typical Sloppy Joes. They have great flavor and they're packed with veggies. Hence the name "Sneaky" Joes. The Foodie Bride blended the veggies in the food processor to sneak them in on her husband. This would also be a great way to sneak veggies in, if you have kids. 

I made a few adjustments like adding chorizo and using sweet hot mustard. I always end up using ground beef, because I always have a ton in the freezer. Next time, I'm going to try it with ground turkey. Either way, I promise you'll love this recipe. It smells incredible and it reheats really well for lunch the next day!

Read on for the recipe...

Somewhat Sneaky Sloppy Joes
  • 1/2 medium onion
  • 1 large carrot, peeled
  • 1 large red bell pepper
  • 1 zucchini, peeled
  • 2 cloves of garlic
  • 1 lb. ground beef or turkey (use 1 1/2 lb if you like lots of meat)
  • 1/2 casing of chorizo
  • 1 Tbsp. olive oil
  • 2 Tbsp. chili powder
  • 1/2 tsp. cumin
  • 15 oz. can crushed tomatoes
  • 1/4 cup water
  • 1/4 cup dark brown sugar (not packed)
  • 2 Tbsp. red wine vinegar
  • A couple dashes of hot sauce (I used Tapatio)
  • 1 Tbsp. Worcestershire sauce
  • 2 Tbsp. Sweet Hot mustard
  • 2 Tbsp. tomato paste
  • Salt and Pepper
  • Buns (for serving)
Start by peeling the veggies and cutting them into large chunks.


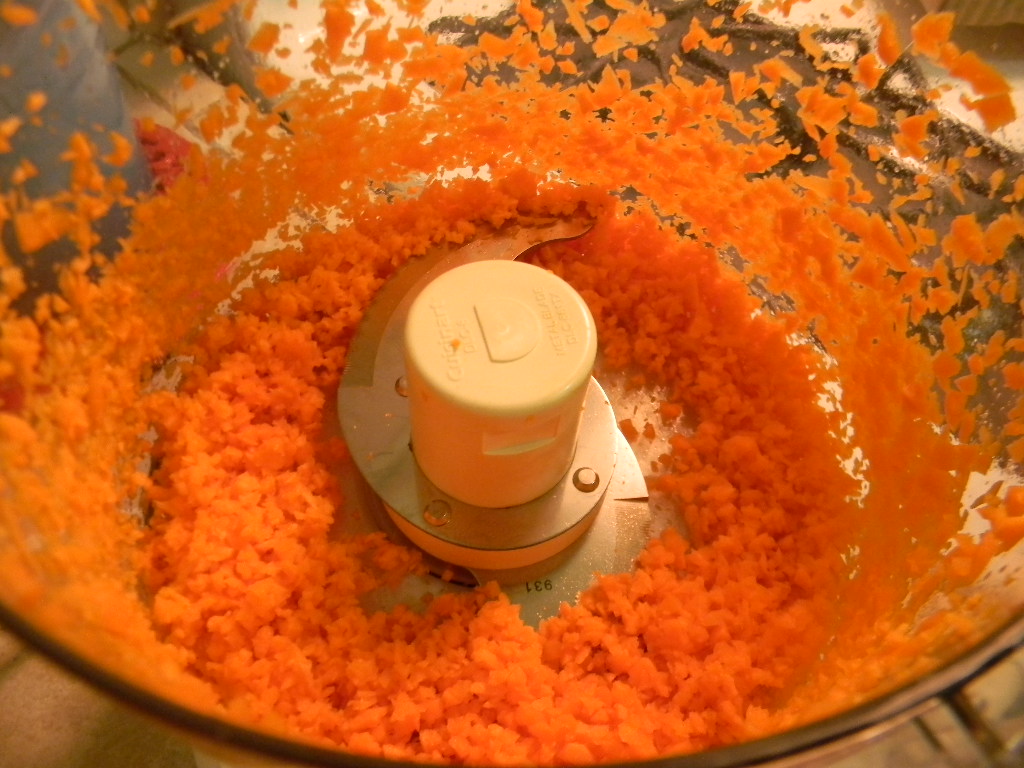
Place the carrot into the food processor first (it needs a little extra time in the chopper). Pulse the carrots until they are finely chopped. Then add in the onion, garlic, zucchini and bell pepper. Pulse until the veggies are "obliterated" (in the words of the Foodie Bride), so that will blend into the meat mixture undetected. It will smell amazing, like salsa.


Cook the beef and chorizo in a large skillet. Be sure not to overcook the meat, because it will continue to cook when added to the veggies. Drain the fat from the meat, then set meat aside. 

Heat olive oil in the pan over medium-high heat. Add the vegetable mixture to the pan and cook, stirring often, until most of the liquid cooks off (about 10 minutes). Add the chili powder and cumin to the veggies, stir. Now mix the meat into the veggie mixture.


Add the crushed tomatoes, water, brown sugar, vinegar, mustard, hot sauce and tomato paste to the pan. I even add some crushed red pepper, because we like it HOT. Reduce the heat to medium and cook for another 10 minutes, until heated through. Add salt and pepper to taste. Serve on toasted buns. Delicious!


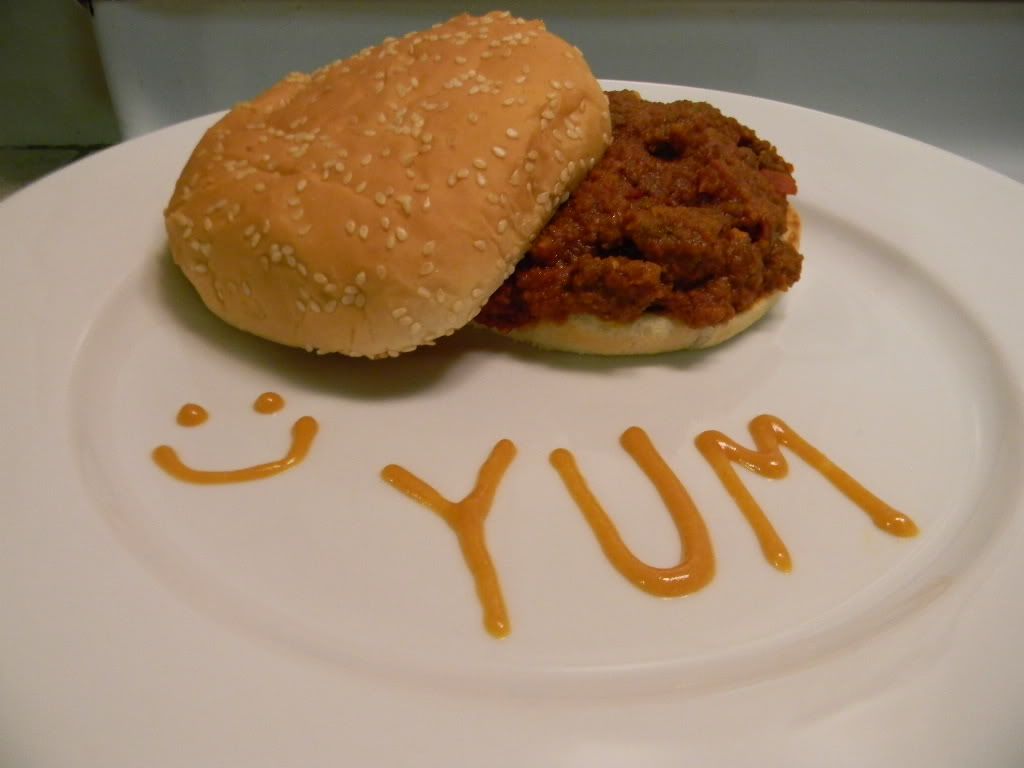
Is it just me or is it extremely difficult to make a Sloppy Joe look pretty in pictures?


Pin It

Makeover Results: Dresser and Hutch

I finished this months ago and am just now posting. Ryan and I got this piece and at a local antique store (to see what it looked like before click here). I fell in love with it, but we had no place to put it. Then it hit me, I still didn't have a desk for my craft room. Why not use it as a workspace/storage? Brilliant! I absolutely love the way it turned out.


If you look at the before pictures, you can see that it was a lavender color, yuck. I've just never been a fan of pastels, not even at Easter. So I decided to go with a neutral color, a cream. As I said earlier, I had the brilliant idea to sand and paint in 100 degree weather. I just think of it as dual-purpose: refinishing a piece of furniture and sweating out all of the toxins in my body.

I didn't do any heavy sanding or use a primer before painting. I just wiped off all the dust, then got to work painting every little nook and cranny. Which, as you can see, there are a lot! That's part of what I loved about this piece: all of the curves and grooves. Avoiding paint drips from all of these curves and grooves, however, was a major pain in my derrière. After two coats, I didn't like the sheen of the paint, too shiny. So I did a third coat with a flat paint in a slightly darker color, the first being brighter than I thought.

The last step : sanding the edges to give it that antique/shabby chic look. I thought that being outside, in the open air, and sanding by hand (not a big electric sander) wouldn't warrant goggles or a mask. Wrong. A word to the wise, wear goggles at least. Even if you don't see much dust coming off. Your eyes will thank you later.

You want to sand every edge that would be exposed over time to rubbing. The beauty of it is, it doesn't have to be perfect. You want it to look worn and old. All those imperfections give it character.


The original piece was meant to be a vanity/dresser, so there was a mirror on the left. The mirror was broken, which was partly why we got such a good deal. We took the mirror out and Ryan cut a piece of steel to fit the opening. He spray-painted it with a metallic silver and then sealed it. Now, I have a fantastic magnetic board.


I like to use antique teacup saucers as little catch-alls. I also filled the thrift store frames (from my sister's baby shower) with some of my favorite photos. The ribbon holder below was 50% off at Michael's recently, which made me a happy girl. I was finally able to wrangle up all of my ribbon.


These little ball jars are great for storing all of those card-making details: buttons, brads, etc.


Look at all of that storage! The center cabinets have just one shelf inside. Our plan was to knock the shelf out so that I could pull my chair up to it and set my feet in there. The shelf is proving to be harder to get out than we thought. 


How handsome are my great uncles? The youngest one, on the left, lied about his age to become a sailor during WWII. I love hearing his stories. My favorite being the story of how he got the naked lady tattooed on his forearm in Pearl Harbor by a 14-year-old tattoo artist. On the right, my grandparents on their wedding day. These photos are waiting patiently for me to frame them and create the wall of black and whites I've been wanting to do.


I got the little tub above for $2.50 at Target. The boxes below were on sale for 1.66 at Michael's. 


I love my new craft room! It's so organized, now let's see if I can keep it that way.


Pin It

Sunday, October 9, 2011

Robot Baby Shower : Food Details

I wanted to share with you some of the food details from the baby shower. Below are little wrapped chocolates. I like to use Hershey's Nuggets. Ryan printed robot images onto file folder labels and then simply wrapped them around the chocolates. Return address labels are also the perfect size for these little nuggets.


I also used the Robot Party Cricut cartridge to make these super cute cupcake toppers. The mom-to-be requested her favorite: rainbow chip cupcakes. We also made chocolate fudge cupcakes with cream cheese frosting. Oh yeah!


I know it may be unusual to have adult beverages at a baby shower, but it was at the request of the mommy-to-be. She wanted everyone to be able to enjoy a cocktail, even though she couldn't. What a gal!

I made lemonade and then had raspberry and pink lemonade flavored vodka on the side so that guests could spike their drinks as they please. Ryan suggested sangria as another option. We used the recipe below from allrecipes.com. It was rather tasty. The recipe was a little different from most sangrias I've tasted, but everyone loved it.

            
Sangria Recipe from allrecipes.com, thanks Hjacoby!
  • 1 (750 mL) bottle of dry red wine
  • 1/2 cup brandy
  • 1/2 cup triple sec
  • 1/4 cup lemon juice
  • 1/3 cup frozen lemonade concentrate
  • 1/3 cup orange juice
  • 1/4 cup sugar (optional)
  • sliced lemon, lime and orange
  • 8 maraschino cherries
  • 2 cups club soda
Mix together the wine through the sugar. Add the sliced fruit and cherries. The longer you let the fruit soak, the more flavor there will be. Add in the club soda just before serving. This recipe makes about 6 cups worth of sangria. I quadrupled the recipe to fill the drink dispenser.

I also came across an ingenious tip. Usually, you add ice to a large drink container...ice melts...drink tastes watered down. :( Avoiding the watered down taste is as easy as filling an ice cube tray with whatever you will be drinking. Some of you may be thinking...duh, but it had never dawned on me to do it before now. So I made up some lemonade, the night before the shower, and filled 3 trays.

Photos by the beautiful Sarah B from MissSarahLou


Pin It

Saturday, October 8, 2011

Baby Shower Game : the Price is Right

Oh, how I loved the Price is Right when I was a kid. Every summer, I would spend my mornings, bowl of cream of wheat in hand, watching the Price is Right. I had high hopes of winning a showcase showdown some day. A child sure can dream.

That leads me to the third game we played at the shower: the Price is Right, baby edition of course. Ryan and I went to Target and took pictures of about 10 baby-related items: diaper genie, baby food, formula, baby shampoo, diaper cream, baby monitors, etc. Ryan took pictures of the items with his phone, as well as their price tags. We made sure to choose items that had prices with odd change, such as $4.72 or $16.38 versus items ending in .99 or .00, it's more challenging that way.

Ryan took all of the photos and put together a PowerPoint. He even made a game show curtain backdrop. He's so good. During the shower, we hooked the laptop up to the TV, using an S-video cable, so that all the guests could see the products that they were "bidding" on.

Everyone got a mini whiteboard and marker. I used the mini whiteboards from my classroom, but I bought them originally at Target (4 for $1) in the dollar section, by the registers. You can usually find them there during the back-to-school season.


When an item appeared on the screen, everyone wrote down what they thought it cost. Be sure to mention the store that you took the prices from, because prices can vary greatly from store to store. And believe me those, who are competitive, will challenge you if you don't.

Everyone flipped their board over at the same time. The person with the closest price, without going over, got a point. The person with the most points, after all of the items, received a gift. It was fun to see how different the bids were. You could definitely tell who hadn't bought baby items in awhile (or ever), and who had little ones at home. Some of us were WAY off. I cannot believe how much formula costs! I think it was also informative for my sister. Now she knows what to expect.

Check out those gifts! My sister made out like a bandit.


Pin It

Baby Shower Game : Scattergories

I'm a BIG FAN of game nights. Scattergories being one of my favorite games to play. So I came up with my own version of Baby Edition Scattergories. The categories are general, but I included the mom-to-be and baby's names to personalize it. I printed them off on white cardstock, front and back (two rounds), so that it would be a little easier to write on. Make sure you have lots of pens ready.


If you've never played Scattergories, it's really easy. Each round has a letter (an easy way to choose letters is to use the baby's initials). Once the timer is started, each person writes down a word that fits the category, but it must start with the letter. Once time is up, go around the circle (one category at a time) and have everyone share what they wrote down. If two or more people have the same word, no one gets the point. Each answer that is original gets a point.


You can also allow double points for double letters. Here's an example with the letter "R" :
..........................................................................................................................
Food a pregnant woman craves                                       raspberries

Body part that swells or aches while pregnant                  rump

Where the new mommy will be when her water breaks  Red Robin 
(Red Robin would be worth 2 points for using the R twice)
............................................................................................................................
So the words above would be worth 4 points, as long as no one else had the same answers.


We had so much fun with this game. Some of the answers were hilarious! Oh and feel free to "veto" someone's answer as a group, if it's too much of a stretch (Ex: food a pregnant woman craves - elephant).

Mommy-to-be waiting to hear the letter for round one


Pin It

Baby Shower Game : Candy Bar Clues

When planning the baby shower, I really wanted to stay away from the typical, completely gross baby shower games, like smell the melted chocolate in the diaper, blindfolded baby food taste test and sucking anything out of a bottle. After scouring the net and brainstorming, I came up with three games : candy bar clues, Scattergories and the Price is Right.


First up, the candy bar clue game. To start with, I laid out all of the candy bars on the floor so that everyone could see them. I had a list of clues to describe each stage of having a baby: conception, pregnancy, the birth and bringing baby home. I've listed a couple of my favorite clues below:

Daddy at conception: Big Hunk
Contractions: Now and Later
Epidurals: Lifesavers
11 pound babies: Whoppers
Time alone for the new parents: Zero

I read the clues aloud and the first person to shout out the correct candy got to keep it. Warning : the more guests you have, the harder it is to figure out who said it first. I'm sure there's a better way to set up this game for larger groups, I just couldn't think of one.

For a full list of the candy bar clues, read on...

Friday, October 7, 2011

Letters to Baby Riot

My sister's baby showers were a success! Over the next few days, I'll be sharing lots of ideas with you all, for a robot-themed baby shower. First up, the letters to baby Riot.

Often at baby showers there is an opportunity to write down advice for the mom. I thought it would be fun to write advice to the baby that would soon be joining us. I was inspired by this letter to baby Violet Marie over at Eat Drink Chic. By inspired, I mean I kept most of the letter's wording and added fill-in-the-blanks. I tried to re-word it, but it was just so perfect. I hope that Amy over at Eat Drink Chic doesn't mind.


I addressed the letters to Riot, my future nephew, leaving the blanks for guests to fill in. The letters were laid out for guests to fill in as they arrived. I made the sign by spray painting a thrift store frame and backing the title with striped cardstock. 


We strung (is that a word?) ribbon over the fireplace so that guests, once finished, could clothespin their letters for all to see. It was fun to read what everyone wrote. I'd like to think that Riot got a lot of good fashion advice (i.e. stay away from parachute pants, socks with sandals and skinny jeans for men).


I'm going to gather all of the letters into a book for Riot. The mom-to-be took a picture with each guest before leaving. That way each letter will have a photo next to it, so Riot can put a face to the name and advice.

After the shower, when the men (dad, uncle and grandpa) re-emerged, I made sure that they gave Riot some manly advice as well. We wouldn't want it to be one-sided. 

Photos by my amazing friend Sarah B over at Miss Sarah Lou


Pin It
Related Posts Plugin for WordPress, Blogger...