Showing posts with label Paper Crafts. Show all posts

Wednesday, February 1, 2012

Mustache Bookmarks


I recently got Photoshop and I've been trying to learn how to work its magic. Inspired by these Valentines from Plum Adorable, I decided to make mustache bookmarks for my little sister's birthday. I started with photos of my baby nephew in Photoshop and then ran with it. It was worth it for the sheer amusement; I laughed out loud so many times (Ryan gave me the "you're weird" eyebrow lift). My nephew is just too cute, especially with a Mario Brothers' mustache.


I made the bookmarks to accompany the first two books of The Hunger Games trilogy in her birthday package. If you haven't yet, you should must read these books! They're pretty addicting.


To start, I used my sister's instagram photos of the baby, but any photo cropped down to a square will work. Then I googled "free mustache clip art." Here's a 'stache that I used. I used Photoshop to add the mustaches to the photos. If you don't have Photoshop, I'm pretty sure you can do the same thing with Pixlr for free!


I then came up with mustache-related sayings. Only one is actually related to reading...oh well! After printing the bookmarks off, I cut 'em out and glued 'em to cardstock in a contrasting color.

Friday, January 13, 2012

Goals for 2012

I usually don't make HUGE New Year's resolutions. I tend to make a long list of mini goals to achieve and better habits to adopt throughout the year. This year I made my list as usual. Then I came across this manifesto idea by Aileen at Creating Clever. Inspired by the manifesto, I made my own (of sorts) ...


Sorry about the somewhat blurry screenshot view. As soon as my printer decides to be my friend again, I  plan on printing this little beauty and framing it around my house (bathroom, craftroom, fridge, nightstand) to remind me to get my butt in gear.

fearless in the kitchen: I find myself thinking "that seems like a lot of work" or "I'm no chef, how do I do that?" No more of that. I'm gonna try new techniques and new ingredients. I will make more things from scratch. I will not be intimidated.

Monday, December 12, 2011

DIY: Vintage Dictionary Flowers


I bought a dictionary from the '50s at the flea market for $3. I bought it with the intent to rip out the pages. Some of you might think that's a crime, and normally I would feel bad about ripping up a book, especially a really old book, but the binding was falling apart and I already have more dictionaries than I need. So I decided to show it a little love and give it new life as these beautiful origami flowers.


I found the tutorial for these flowers over at Folding Trees.


A bonus when making these flowers, you learn new words or come across definitions that are just plain funny (at least to me).

winker n. 1. one who or that which winks 2. Colloq. an eyelash or an eye
(who refers to an eyelash as a winker? "Ouch, I have a winker in my eye!")

fop n. a man who is excessively concerned about his manners and appearance
(Was this the 50's version of a man who's "metro" ?)

foppery n. the manners, actions, dress of a fop

......................................................................................................................................

Now here's my attempt at an origami photo tutorial. I'll try to explain the steps, but if you just follow the pictures you should be good. All of the steps and folds may seem daunting, but once you get the hang of it, it goes fairly quickly.


Start with a book page cut down to a 5" square. 


Bring two corners together to form a triangle. Bring the bottom right corner up to the top corner.


Now bring the left corner up to the top corner, which will leave you with a small diamond.


Thursday, November 17, 2011

An Easy Way to Give Thanks


385 miles later and I am sitting in a little motel circa 1952 in Eugene, OR. I'm on my way back home to keep my very pregnant sister company until my little nephew arrives. I decided to stop halfway into the drive, because it is a loooong trip to do all at once...alone...especially if you have a tendency to get sleepy driving...even after three mochas. So here I am. I just got my laptop back after having the hard drive crash and losing all of my docs and photos. Sad times. Now I finally have a chance to share this little project I threw together a few days ago.

The Thanksgiving decorations are looking a little slim at my house this year. So I was super excited when I came across this freebie over at Sugartotdesigns that can be put together so easily. I think it took me about 10 minutes!

Remember this thrift store frame from the baby shower? This was a great new use for it.

You'll need:
- a large frame
- free printable from Sugartotdesigns
- cardstock in colors and patterns that suit your fancy
- scissors
- gluestick
- dry-erase marker


 How funny is this extreme gluestick? I like feeling extreme while crafting.


Print off the freebie in the color you like (Sugartotdesigns offers four colors to choose from). Back it with a solid-colored cardstock. Then arrange patterned papers behind and close frame. So easy!


 I hung the frame in our dining room. 


Simply use a dry-erase marker to fill in what you are grateful for. The beauty is that you can hang it up at the beginning of the month and then fill in something new every day counting down to Thanksgiving. It's a nice reminder each day of the blessings in your life. Here are a few of mine:


Wednesday, November 2, 2011

Harry Potter and a DIY Paper Wig

Now I am one of a rare and dying breed...those that have never read any of the Harry Potter books or seen any of the movies. Gasp, I know. And it just so happens that Ryan and I were invited to a Harry Potter-themed Halloween party. What's a girl (with no Harry Potter knowledge) to do? Google it.

We decided on Gilderoy Lockhart for Ryan. One rented 3-piece suit and a carefully styled wig later...

            
When it came to me the first suggestion was Madame Maxime. She's a French teacher...I'm a French teacher, she has a brunette bob...I have a brunette bob. My research revealed that she is mighty tall. Ryan's suggestion: "Just walk around on stilts." Um...I was definitely not committed enough to the character to risk a broken ankle.

Then we came across Sybill Trelawney, Professor of Divination. Big coke bottle glasses, hippy attire, and long wild hair. Now that's a costume I could put together.

            
Call me weird, but I refused to wear a wig from the costume rental store. The wigs I looked at had bobby pins and leaves still in them from the last customer. Scenarios ran through my mind of how someone ends up with leaves in their wig. No thank you. 

The used wig was out. Store-bought wigs were pricey. I had made a paper wig in the past while working at a summer camp for kids. Trelawney's crazy hair would be easy to make out of paper. It's really simple, let me show you...

All you need is a hot glue gun, scissors, paper of your choice, and a beanie. The first time I made a paper wig, I didn't use a beanie. I simply made a skull-cap by holding butcher paper over my head and wrapping masking tape around, then trimming it.


Since Trelawney's hair is sort of a brushed out perm, I wanted to give the paper texture. This paper crimper did just that.


After running sections of paper through the crimper, I cut them into strips. Next, I folded the strips accordion style.


The last step is to glue the pieces to your beanie (or paper cap). 

Sunday, October 16, 2011

Robot Baby Shower Decor


I wanted to share some of the details from the robot baby shower. 


This is another thrift store frame that I spray painted. It's an easy way to a give a pop of color, as well as label different areas of the shower. There were a lot of people that didn't know each other, so I thought that name tags would be nice. They were especially nice in keeping track of points during the games.


The Robot Party Cricut cartridge arrived the day before the shower, so I was able to make this banner just in time. The cartridge hand so many amazing shapes, I wish that I would have found it sooner. Oh well, I guess Riot is just going to have to have robot-themed birthday parties as well. 

I had this piece of wall "art" laying around in the garage. I bought it a few years ago on clearance at Target for $8. I figured just the frame was worth that much.

I wasn't in love with the tropical leaf so I took it out. I painted a few coats of chalkboard paint directly on the glass. Not digging old-school chalk, I ordered these little guys on Amazon. Chalkboard markers are so cool!

Ryan was an amazing help with all of the decorations. Guests really liked his welcome sign using the chalkboard. Check out the after. The new mommy liked it so much, she asked if she could put it in the baby's room. After the shower, Ryan erased Welcome and wrote Riot's Room.

Ryan also used the chalkboard markers to add these little robots to the bathroom mirror. The markers can be used on chalkboards, windows, mirrors, and more. All it takes is a little water to clean it off.


How cute is the robot baby with a robot teddy bear?!


Many of the photos by Sarah


Pin It

Thursday, October 13, 2011

Robot Baby Shower Favors

We go through a lot of bottles of Starbucks Mocha Frappaccino at our house. We buy them by the case at Costco. So I was so excited when I came across this great idea using the bottles over at Kerry's Crafts. I began hoarding the bottles in our mud room, knowing that I would find a use for them eventually.


TA DA! I decided to finally put the bottles to use in creating the favors for my sister's vintage robot-themed baby shower. The first step was getting the sticky labels off. After hand-washing the first ten bottles and slowly peeling off the labels, not without much frustration, it dawned on me to put them in the dishwasher. Not only does the dishwasher get them spic and span, but right after the drying heat cycle the labels peel off so easily. Just make sure you pull them out and take the labels off while the bottles are still warm.

After the lids were clean, I primed them with a primer spray paint. Trust me you're gonna wanna prime the lids, because the Starbucks logo is very dark and will show through. Then I followed up with some sparkly silver spray paint.


Once you have clean bottles and painted lids, it's time to cut the paper. I used a vintage looking paper pad by My Mind's Eye called Complete Boy. I cut the paper into strips 2 1/2" wide and 9 1/2 " long. 


Put a strip of double-stick tape on each edge and a little strip in the center. Wrap the paper around the bottle, secure the edge and voilà...


I punched out circles and robots then ran them through my sticker maker so that they would stick really well to the bottles.


The finishing touch was a little bit of sparkle. I ran Stickles, which I love, around the circles.


Now, let me tell you a little story to explain the display...

On my drive to the park where Ryan plays softball, there is a farm-style house, wrap-around porch and all, with an organic tomato stand out front. Every week, I slow down as I drive by, gawking at how adorable it is. One week, I drove by and they had a ton of antiques and goodies out front in the yard. I dropped Ryan off at his game and came back right away. It turns out they were setting up for a yard sale the next day, but they were such nice people they let me look around. Not only had the family owned an old-fashion soda fountain in town, but they recently threw a wedding in the backyard for their daughter. This led to many amazing finds for me including : retro tin drink signs, large vintage window panes, and much more.

I spotted boxes of these small wooden crates. They had used them for centerpieces at the wedding. I jumped on the little crates (they were only 50 cents each!), itching to find a use for them.

I primed and spray painted a couple of the crates with a robot silver. Then used them to display the favors at the baby shower. I also sprayed a couple of the crates red to prop up the drink dispensers, which you can see here.


The last step was to stuff the bottles with something delicious. We displayed the bottles near the entrance with this sign that I made using a spray-painted thrift store frame.


Pin It

Wednesday, October 12, 2011

Makeover Results: Dresser and Hutch

I finished this months ago and am just now posting. Ryan and I got this piece and at a local antique store (to see what it looked like before click here). I fell in love with it, but we had no place to put it. Then it hit me, I still didn't have a desk for my craft room. Why not use it as a workspace/storage? Brilliant! I absolutely love the way it turned out.


If you look at the before pictures, you can see that it was a lavender color, yuck. I've just never been a fan of pastels, not even at Easter. So I decided to go with a neutral color, a cream. As I said earlier, I had the brilliant idea to sand and paint in 100 degree weather. I just think of it as dual-purpose: refinishing a piece of furniture and sweating out all of the toxins in my body.

I didn't do any heavy sanding or use a primer before painting. I just wiped off all the dust, then got to work painting every little nook and cranny. Which, as you can see, there are a lot! That's part of what I loved about this piece: all of the curves and grooves. Avoiding paint drips from all of these curves and grooves, however, was a major pain in my derrière. After two coats, I didn't like the sheen of the paint, too shiny. So I did a third coat with a flat paint in a slightly darker color, the first being brighter than I thought.

The last step : sanding the edges to give it that antique/shabby chic look. I thought that being outside, in the open air, and sanding by hand (not a big electric sander) wouldn't warrant goggles or a mask. Wrong. A word to the wise, wear goggles at least. Even if you don't see much dust coming off. Your eyes will thank you later.

You want to sand every edge that would be exposed over time to rubbing. The beauty of it is, it doesn't have to be perfect. You want it to look worn and old. All those imperfections give it character.


The original piece was meant to be a vanity/dresser, so there was a mirror on the left. The mirror was broken, which was partly why we got such a good deal. We took the mirror out and Ryan cut a piece of steel to fit the opening. He spray-painted it with a metallic silver and then sealed it. Now, I have a fantastic magnetic board.


I like to use antique teacup saucers as little catch-alls. I also filled the thrift store frames (from my sister's baby shower) with some of my favorite photos. The ribbon holder below was 50% off at Michael's recently, which made me a happy girl. I was finally able to wrangle up all of my ribbon.


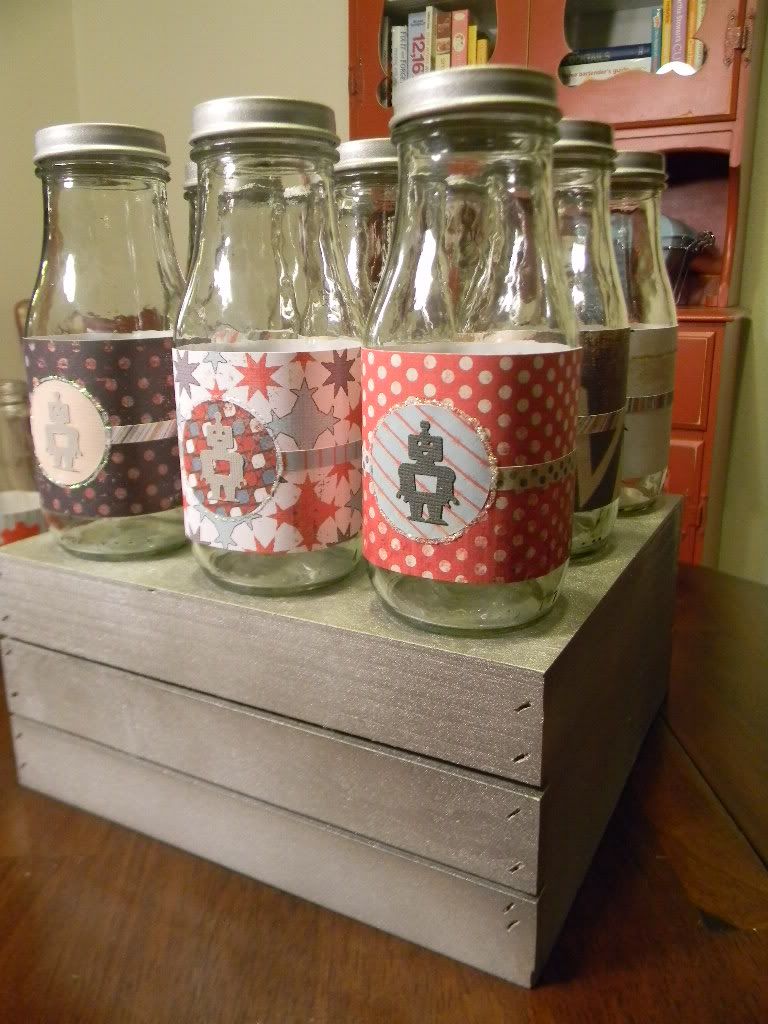
These little ball jars are great for storing all of those card-making details: buttons, brads, etc.


Look at all of that storage! The center cabinets have just one shelf inside. Our plan was to knock the shelf out so that I could pull my chair up to it and set my feet in there. The shelf is proving to be harder to get out than we thought. 


How handsome are my great uncles? The youngest one, on the left, lied about his age to become a sailor during WWII. I love hearing his stories. My favorite being the story of how he got the naked lady tattooed on his forearm in Pearl Harbor by a 14-year-old tattoo artist. On the right, my grandparents on their wedding day. These photos are waiting patiently for me to frame them and create the wall of black and whites I've been wanting to do.


I got the little tub above for $2.50 at Target. The boxes below were on sale for 1.66 at Michael's. 


I love my new craft room! It's so organized, now let's see if I can keep it that way.


Pin It
Related Posts Plugin for WordPress, Blogger...